Nest Boxes for Birds
- Because there are fewer natural sites, populations of cavity-nesting species are shrinking. Nest boxes can help to reverse this trend.
- You can attract different species of birds by varying the size and location of nest boxes.
- By occasionally and carefully inspecting the box during the nesting season you can control conditions in the nest.
- You should thoroughly clean the box and discard used nesting material after the birds leave the box in the fall.
General information
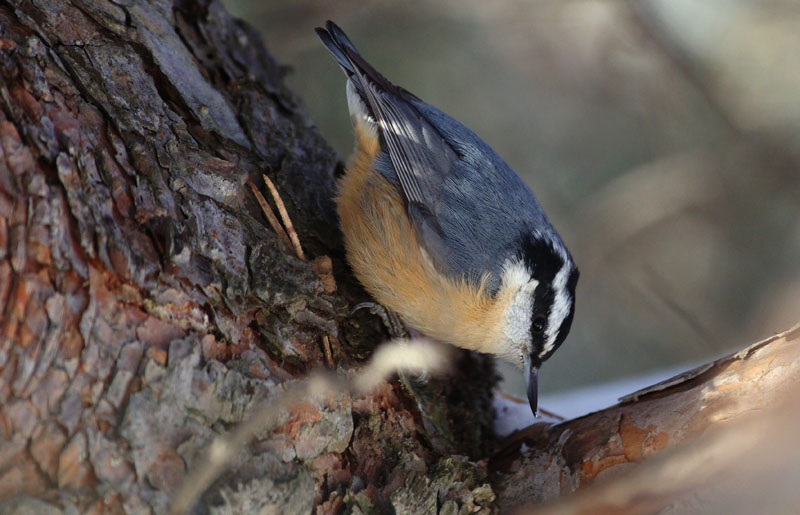
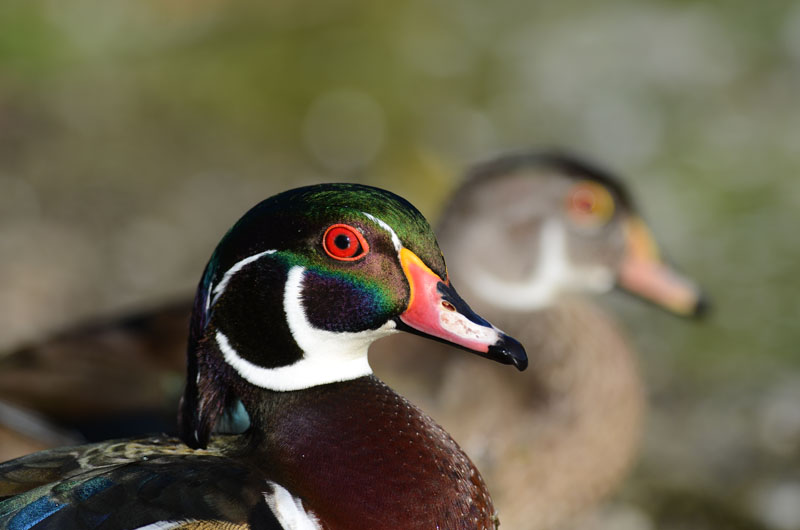
In Canada, about 50 species of birds, ranging in size from wrens to ducks, nest in cavities. Normally, woodpeckers and chickadees excavate these cavities in decayed trees or stumps. These birds make new holes each year, leaving the old ones for other cavity-nesting birds. Natural nest sites disappear as weakened or dying trees are removed from our forests for economic and safety reasons. As a result, there is intense competition for nest holes, with declines occurring in local populations of cavity-nesting species in recent years. By providing nest boxes in appropriate areas, we can help reverse this trend. You will find more information on nesting in Table 1.
This web page is a guide for building nest boxes. Elaborate designs for boxes are available in many books and magazines, but the plans described here have been kept simple so that builders, including children, should be able to construct these boxes quickly and easily. Expense can be kept to a minimum by using waste ends of lumber. Whatever the design or material, the boxes should be strong, weatherproof, and securely fastened.
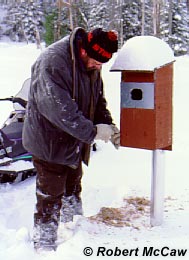 Single-compartment nest boxes are the easiest to build and the most frequently used by birds. Build the box to allow for annual cleaning and occasional observations. Thoroughly clean the box and discard used nesting material after the birds have left the box in the fall to eliminate parasites. There is no need to put nest material into the box in the spring; most birds prefer a clean empty box that they can line themselves. For birds of the woodpecker, owl, chickadee, and duck families, a layer of wood chips or shavings (not sawdust) about 2.5 cm deep may be placed in the bottom of the box.
Make sure your box will be a comfortable, dry home. Drainage and ventilation are important features of a nest box. Both can be provided by drilling a few small holes just below the roof overhang and in the floor of the box near the walls.
Protect your boxes from predators. A platform or perch at the entrance provides a support to animals raiding the nest, and may tempt young birds to venture out of the box before they can fly. Place nest boxes on poles well away from trees and shrubs to stop squirrels from jumping to the roof of the box. To prevent raccoons from raiding duck boxes, make the entrance hole oval in shape and erect the pole in water near the shore. Protect boxes that are placed on poles with a predator guard, such as a large inverted cone or a 60-cm strip of metal wrapped around the pole. A large clean plastic bottle (e.g., a bleach container) with the bottom cut out and nailed to the pole at the neck would also work.
Parasites are common in most nests, and their numbers increase as the season progresses. Young birds usually leave the nest before parasites become a major problem. If, however, weather and food conditions allow the adult pair to start a second clutch, and this set of eggs is laid in a box already infested with parasites, the young seldom survive. Providing a second box approximately 6 m away can help reduce chick death from parasites. Leave the second box closed until about nine days after the first eggs have hatched, when the adult is ready to re-nest. You may also control parasites by sprinkling diatomaceous earth in the nest box. This nontoxic substance scratches the outer covering of many parasites, causing them to die of dehydration. It is completely harmless to other life-forms.
Although the basic design for nest boxes is standard, the size and location of the box will vary depending on which species of birds you wish to attract. Table 2 gives the dimensions of nest boxes for some common species. It is important to make the entrance hole the correct size to attract the species you want. You may suspend the box from a tree, mount it on a pole, or attach it to a building 1 m below the roof. Try to find a location that is protected from the sun for part of the day, and turn the entrance away from the usual direction of wind and rain.
Materials
Use any wood that resists weathering. Softwoods, particularly pines, are easy to work with, won’t split badly when nails are driven in, and are very weather resistant. Avoid poplar and basswood as they are less durable. Normally, 2.5-cm (1-inch) lumber stock will do. A natural log effect can be achieved by using bits and pieces of wood with bark still intact. These mill-slabs can be found in most sawmills, lumber yards, and firewood lots. Slabs are usually cheaper than rough or dressed lumber, which can also be used. Boxes made of dressed lumber must be coated with waterproof varnish if they are to last for many seasons. If you wish to paint your boxes, use natural and subdued browns and greens instead of bright colours. Your box will last longer if sections are glued first with bond-fast glue and are then nailed with 5 cm coated nails. However, do not varnish or paint the inside of the box. The interior walls should have a rough surface to aid the bird in climbing up to the entrance hole.
Four-sided box
Choose a box size from Table 2 for the species you wish to attract. Cut two identical squares of board for the floor and the lid (width=w). Make the back panel the same width as the floor, and the height (h) given in Table 2. Cut two pieces for the sides the width of the floor plus the thickness (t) of the back panel (width=w + t) but using the same height as the back panel. Cut the front panel the width used for the floor plus the thickness of two side panels (width=w + 2t). Again, the height is the same as the back and sides.
To assemble your nest box, see Diagram I. To avoid splitting the wood, drill all holes before nailing. Nail the back panel to one edge of the floor (Figure 1 on Diagram I). Nail the sides to both the floor and the back panel, keeping the front edges of the sides flush with the front edge of the floor (Figure 2). Leave about 5 cm between the top edge of the front panel and the top of the entrance hole. Drill the entrance hole in the front panel to the size recommended in Table 2. Remember to add a climbing surface for duck boxes. Nail the front panel to the floor and both sides (Figure 3).
Cut a board slightly larger than the outside dimensions of the box. Make a groove along the underside 1 cm from one edge of the board. Nail the lid in the centre of this piece to form the cover of the box (Figure 4). The grooved section will form the overhang on the entrance side and will prevent water from dripping off the roof and into the entrance hole. Drill a hole through the top centre of each side panel into the lid part of the cover. Push a nail or peg into each hole to hold the cover in place (Figure 5). To remove the cover, remove the nails. Place a screw through the back of the box, or use square brackets to attach the box to its support.
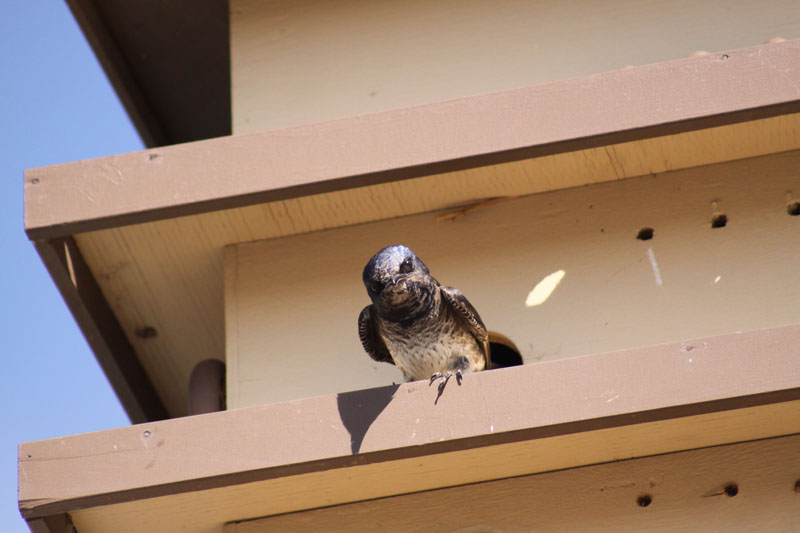
Multi-compartment nest box
The basic principle of the Purple Martin box described here is to build separate units or floors, each made up of four compartments, and to mount one floor over the other. Each unit is fastened to the one below with screws, and the roof is attached to the top in the same manner. This will allow you to dismantle the entire structure, floor by floor, to clean out the boxes at the end of the season. It also permits the addition of other storeys as needed. A two-or three-storey nest box should be adequate for a start.
Set out your martin house in an open area. This will allow the birds to swoop down to the entrances, which are located on opposite sides of the structure. Mount the box at the top of a pole 6 m or more in length for best results. The box should be painted white to reflect the continual sunlight that it will be exposed to.
Use 2-cm (3/4-inch) board for both the inner partitions and outer walls of the structure, but 1.3-cm (1/2-inch) outdoor plywood for the roof/floor sections.
Diagram II shows the basic components with appropriate measurements for a three-storey house. Cut four of section A to make a roof and floors. For the walls and partitions, cut six each of sections B, C, and E and three of section D. Drill small ventilation holes near the upper edges of all B pieces. Ensure the pieces are attached with the vent holes above the floor level so the nestlings will not be in a draft.
Assemble each floor separately (Diagram III) beginning with sections C and B, as shown in Figure 1 of Diagram III. Next, assemble the inner partitions by nailing one section E staggered on either side of section D (Figure 2). Insert and nail these inner partitions between the outside walls (Figure 3). Nail the whole unit to a floor section to complete one floor of the multi-unit box. When all floors are assembled, stack them and attach with screws (Figure 4), finishing with the roof.
Finally, cut and nail two braces (F) to the bottom of your structure (Figure 5). Use these braces to fasten the box to the pole.
Maintenance
Occasional and careful inspection of the box during the nesting season will enable you to control conditions in the nest. Do not inspect the box during the first five days of incubation as the adults are susceptible to disturbances during this period and may abandon the nest. However, make frequent observations from a distance when a bird first takes up residence, to ensure that it is able to enter and exit the box easily. After this period, inspect the nest infrequently. Carry out the inspection as quickly as possible, preferably when the adults are away feeding. If any young have died in the nest, it is best to remove them to prevent live young from being attacked by insects attracted to the dead bird. Sometimes predators will follow a human’s trail to find eggs and young in nest boxes. If you are not sure that you can inspect the boxes without leaving a trail, and without disturbing the adults, postpone your inspection until after the nesting season. Mothballs can help disguise your scent trail.
Keeping Records
To add to your enjoyment of the project, keep records of arrival, nesting, and departure dates. This will allow you to compare records from year to year and can provide useful information for the national Nest Record Scheme. Nest record cards can be obtained by writing to the address provided for your province. Information on all nests in your area is welcome.
A field guide will help you to identify the species in your area. By learning bird songs and studying different behaviours, your knowledge and understanding of birds will expand. The Canadian Wildlife Service and the Canadian Nature Federation have developed a program named BIRDQUEST for people who wish to improve their bird conservation skills. For further information write to:
BIRDQUEST
c/o Canadian Nature Federation
1 Nicholas Street
Suite 520
Ottawa, Ontario
K1N 7B7
(613) 562-3447
Addresses for nest record schemes
British Columbia
B.C. Nest Record Scheme
Royal British Columbia Museum
675 Belleville Street
Victoria, British Columbia
V8V 1X4
(604) 387-2927
Alberta, Saskatchewan, Manitoba
Prairie Nest Record Scheme
Manitoba Museum of Man and Nature
190 Rupert Avenue
Winnipeg, Manitoba
R3B 0N2
(204) 956-2830
Ontario
Ontario Nest Record Scheme
Royal Ontario Museum
Ornithology Department
100 Queen’s Park
Toronto, Ontario
M5S 2C6
(416) 586-5519
Quebec
Quebec Nest Record Scheme
Canadian Museum of Nature
Ornithology Department
P.O. Box 3443, Station D
Ottawa, Ontario
K1P 6P4
(613) 954-4951
New Brunswick, Nova Scotia, Prince Edward Island
Maritimes Nest Record Scheme
Canadian Wildlife Service
P.O. Box 1590
Sackville, New Brunswick
E0A 3C0
(506) 364-5035 or 364-5044
Newfoundland and Labrador
Newfoundland Nest Record Scheme
Natural History Section
Newfoundland Museum
Historic Resources Division
Department of Tourism and Culture
P.O. Box 8700
St. John’s, Newfoundland and Labrador
A1B 4J6
(709) 729-5077
Resources
Print resources
Creative Educational Society. 1974. How to have fun making birdhouses and birdfeeders. Children’s Press, Chicago.
Ehrlich, P.R., and D.S. Dobkin. 1988. The birder’s handbook: A field guide to the natural history of North American birds. Simon and Schuster/Fireside Books, New York.
Godfrey, W.E. 1986. The birds of Canada. Revised edition. National Museums of Canada, Ottawa.
Harrison, C. 1978. A field guide to the nests, eggs and nestlings of North American birds. Collins, Toronto.
Hickin, N.E. 1971. Bird nest-boxing: A contribution to bird conservation by the use of artificial nest-sites. Paul, London.
Peterson, R.T. 1961. A field guide to western birds (North America west of the 100th meridian). Second edition. Houghton Mifflin Inc., Boston.
Peterson, R.T. 1980. A field guide to the birds east of the Rockies. Fourth edition. Houghton Mifflin Inc., Boston.
Pettit, T.S. 1970. Bird feeders and shelters you can make. Putman, New York.
Robbins, C.S., B. Bruun, and H.S. Zim. 1983. Birds of North America. Revised edition. Golden Press, New York.
Scott, S.L., editor. 1983. Field guide to the birds of North America. Second edition. National Geographic Society, Washington, D.C.
© Her Majesty the Queen in Right of Canada, represented by the Minister of the Environment, 1977, 1991. All rights reserved.
Catalogue number CW66-48/1991E
ISBN 0-662-18685-0
Text: Based on a 1961 pamphlet of same name by William H. Carrick
Revision: Judith Kennedy, 1990
Corrections: Vicky Johnston,1997